
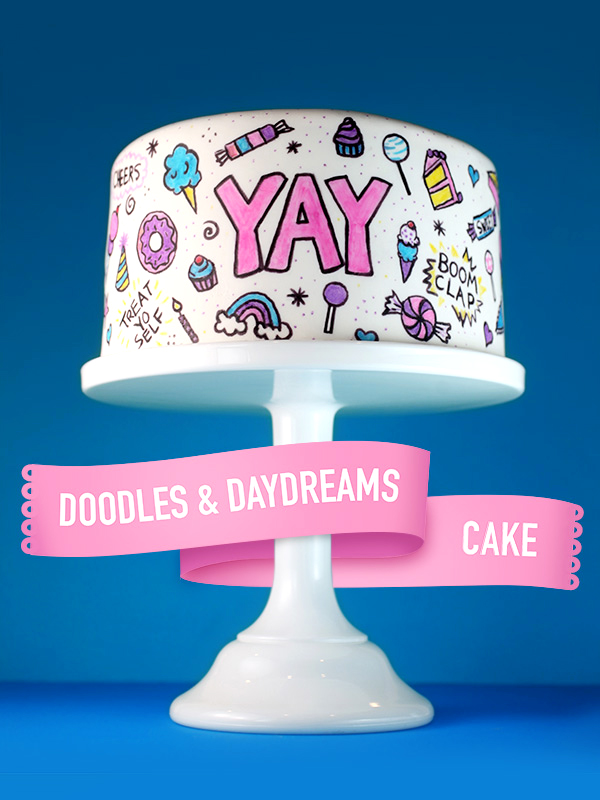
Doodles and Daydreams cake -
I had the most fun doing this layer cake inspired by my friend blogging Sweetapolita new book.
Have you seen it yet? It is full of all kinds of fun and yum. Page after page of recipes for cakes luscious layers and other beautiful and adorable designs that make me want to get in the kitchen and play

. Here, he is. The Bakebook Sweetapolita. When I saw the cover for the first time, I fell in love instantly. This cake told me immediately with its whimsical, playful design and I knew it would be one of the first things I tried.

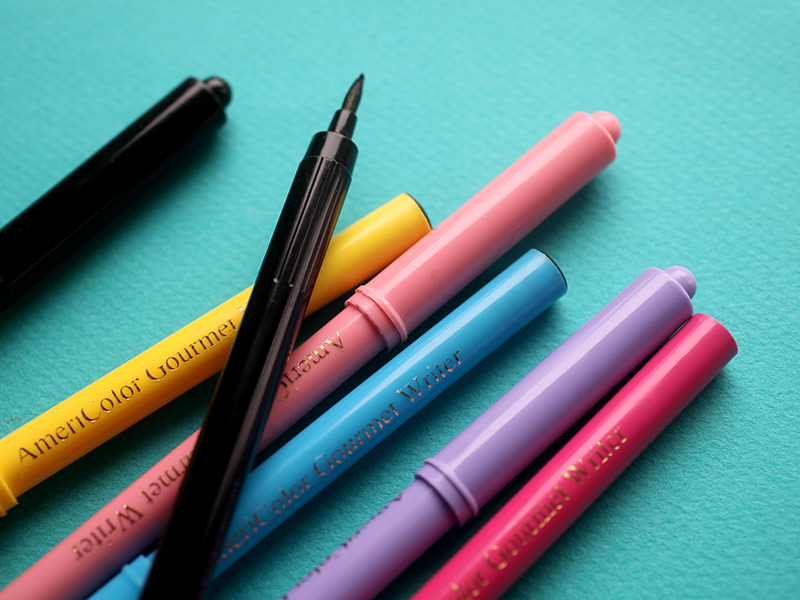
It did not hurt that I've had more than my share of edible ink pens writing on hand so I basically have.
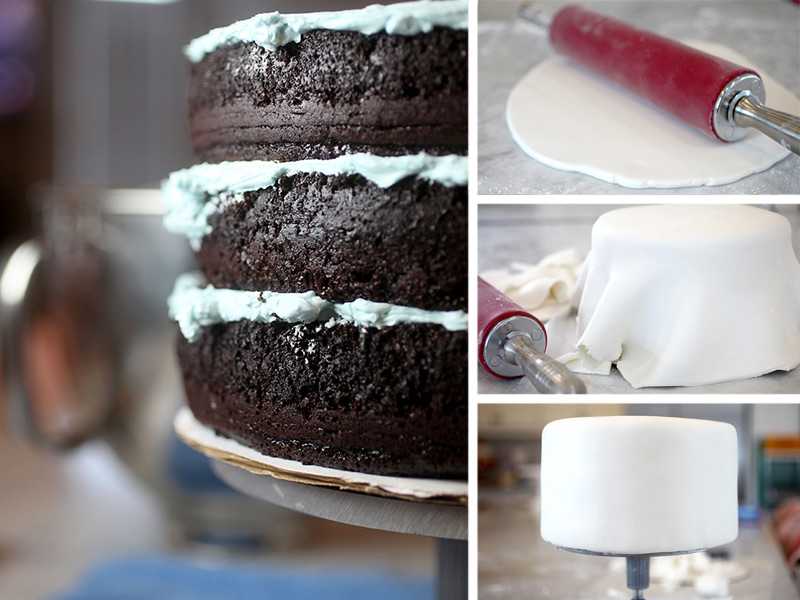
This is a large 8-inch triple layer cake with chocolate filled with swiss meringue buttercream and covered with a layer of white fondant.
Basically, a great blank canvas for your creativity.
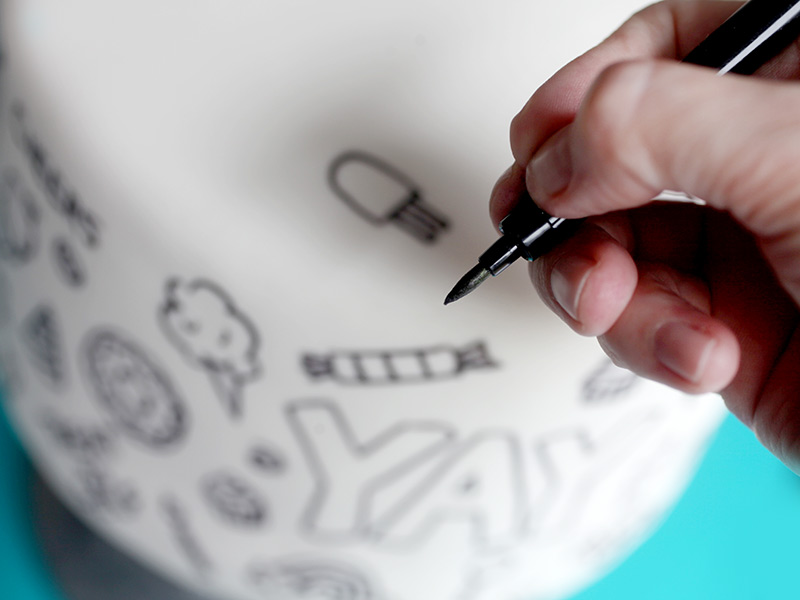
once the cake is covered in fondant and the outside has dried a bit, you can begin to scribble. Structure or draw illustrations by first using the pen with edible black ink and let the ink dry completely before coloring in shapes to help prevent the colors from mixing together.
It can also work in a field at a time instead of all to avoid black ink streaks. For example, if you accidentally put your hand on the surface of the cake. Whoops. Yeah. It's me. I am a Stay at hand when I draw and I quickly realized that drawing at a 0 degree angle and trying not to rest my hand on the surface of the cake was a little more difficult than I had conceived. It's ok but because I think some of my drawings slightly wonky add to the wonder and fantasy of this cake.
I drew simple candy and things using pastel colors, but I also could easily see it transformed into a cartoon cake with words like prisoner KABOOM war and WHAM, etc. ... All drawn in primary colors. It would be too much fun!
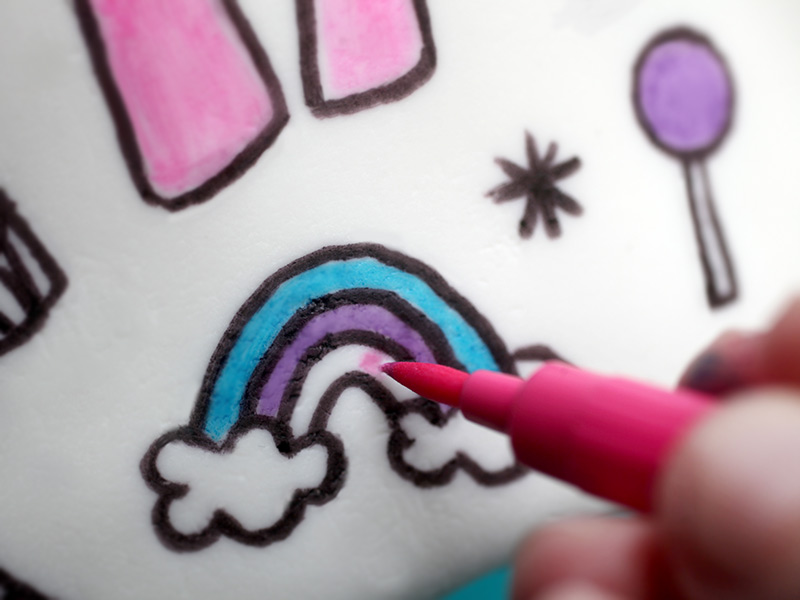
When the black ink has dried, you can start coloring the drawings. That was the fun part ... show live black and white in bold and bright.
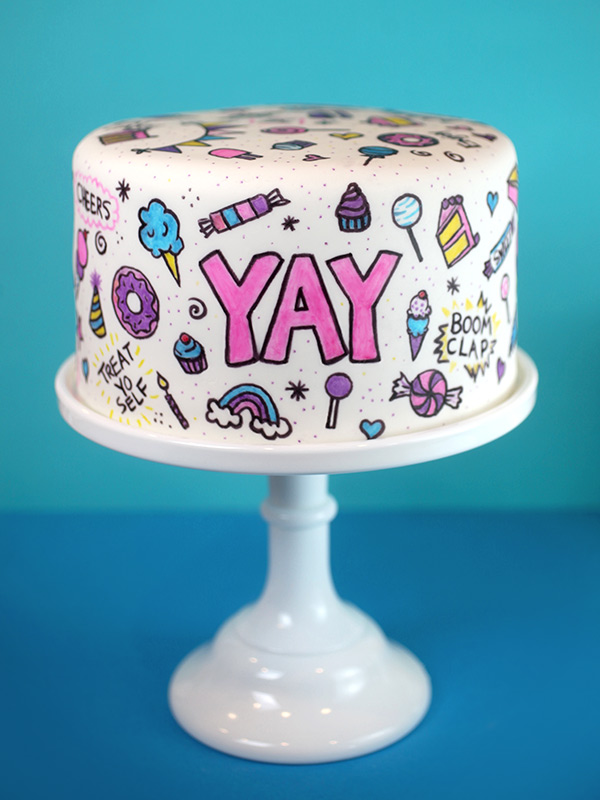
YAY. YAY. YAY. The super cute cake. I like this. Rosie thank you. And now all I can think is another. A styrofoam cake false that I can cover in Fondant keep on the screen and watch every day.
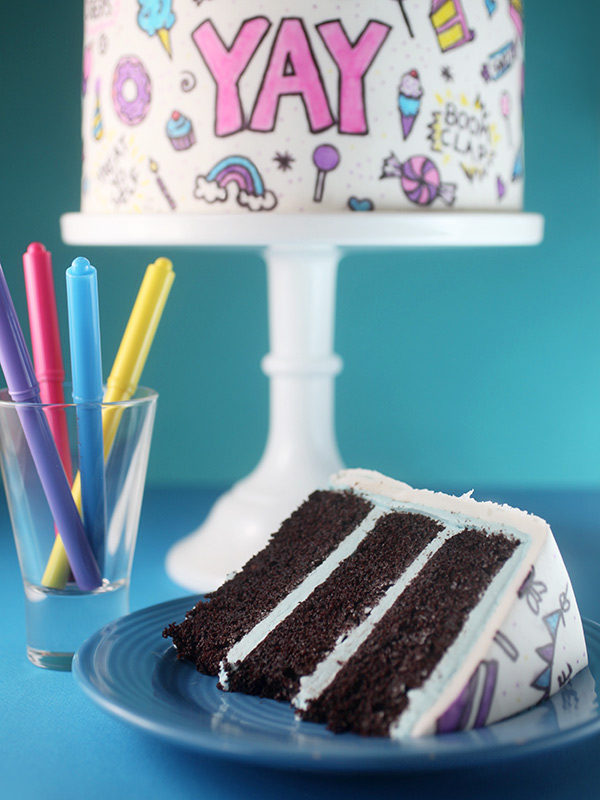
P.S. This cake is absolutely delicious. The project in the book calls for a black velvet cake recipe, but I lit a little so I could try Simple & Splendid chocolate cake and Rosie OMG .........
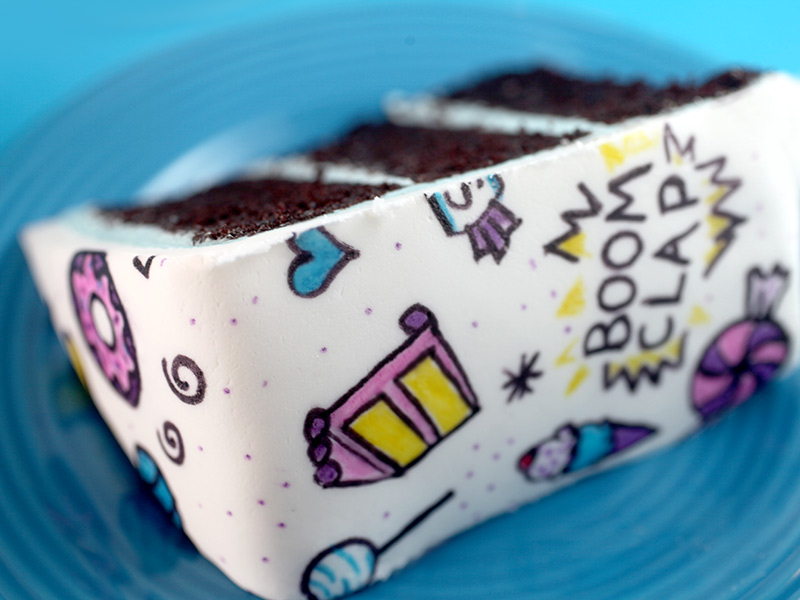
Boom Clap! So. Soooooooo goooood!
Simple Chocolate Cake Splendid
2 1/2 cups all purpose
2 1/2 cups granulated sugar
1 cup dutch dark cocoa powder process
2 teaspoons of baking soda
2 teaspoons baking powder
1 teaspoon salt
1 1/2 cups buttermilk
1 hot cup of coffee
3/4 cup vegetable oil
3 large eggs, room temperature
1 tablespoon pure vanilla extract
7 large egg whites
1 3/4 cups granulated sugar
2 cups unsalted butter , room temperature and cut into cubes
2 teaspoons pure vanilla extract
pinch of salt
:::::::::::::::::: :::::::: :::::::::::::::::::::::::
Enjoy !!!
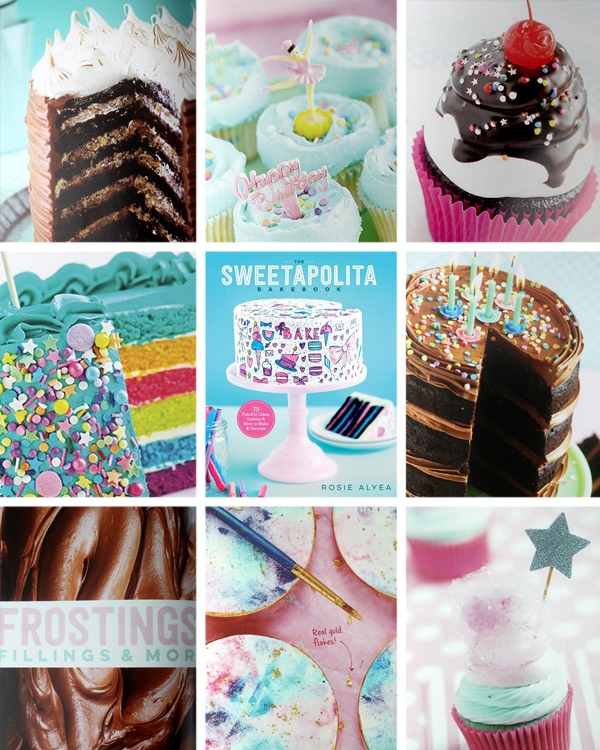
Here's a look at some of the other inside the amazingness Sweetapolita Bakebook.
I think you'll love.
* This post contains affiliate links to Amazon.
I had the most fun doing this layer cake inspired by my friend blogging Sweetapolita new book.
Have you seen it yet? It is full of all kinds of fun and yum. Page after page of recipes for cakes luscious layers and other beautiful and adorable designs that make me want to get in the kitchen and play
. Here, he is. The Bakebook Sweetapolita. When I saw the cover for the first time, I fell in love instantly. This cake told me immediately with its whimsical, playful design and I knew it would be one of the first things I tried.
It did not hurt that I've had more than my share of edible ink pens writing on hand so I basically have.
This is a large 8-inch triple layer cake with chocolate filled with swiss meringue buttercream and covered with a layer of white fondant.
Basically, a great blank canvas for your creativity.
once the cake is covered in fondant and the outside has dried a bit, you can begin to scribble. Structure or draw illustrations by first using the pen with edible black ink and let the ink dry completely before coloring in shapes to help prevent the colors from mixing together.
It can also work in a field at a time instead of all to avoid black ink streaks. For example, if you accidentally put your hand on the surface of the cake. Whoops. Yeah. It's me. I am a Stay at hand when I draw and I quickly realized that drawing at a 0 degree angle and trying not to rest my hand on the surface of the cake was a little more difficult than I had conceived. It's ok but because I think some of my drawings slightly wonky add to the wonder and fantasy of this cake.
I drew simple candy and things using pastel colors, but I also could easily see it transformed into a cartoon cake with words like prisoner KABOOM war and WHAM, etc. ... All drawn in primary colors. It would be too much fun!
When the black ink has dried, you can start coloring the drawings. That was the fun part ... show live black and white in bold and bright.
YAY. YAY. YAY. The super cute cake. I like this. Rosie thank you. And now all I can think is another. A styrofoam cake false that I can cover in Fondant keep on the screen and watch every day.
P.S. This cake is absolutely delicious. The project in the book calls for a black velvet cake recipe, but I lit a little so I could try Simple & Splendid chocolate cake and Rosie OMG .........
Boom Clap! So. Soooooooo goooood!
Simple Chocolate Cake Splendid
2 1/2 cups all purpose
2 1/2 cups granulated sugar
1 cup dutch dark cocoa powder process
2 teaspoons of baking soda
2 teaspoons baking powder
1 teaspoon salt
1 1/2 cups buttermilk
1 hot cup of coffee
3/4 cup vegetable oil
3 large eggs, room temperature
1 tablespoon pure vanilla extract
- Preheat oven to 350 degrees Fahrenheit. Grease the bottom of the three 8 X 2 inch round cake pans and line them with parchment paper.
- Sift flour, sugar, cocoa powder, baking soda, baking powder and salt in the bowl of an electric mixer.
- In a large glass measuring lid, whisk together buttermilk, coffee, oil, followed by the eggs and vanilla.
- With the mixer at low, gradually add the milk mixture and beat until smooth, about one minute. Use a rubber spatular to scrape the sides and bottom of the bowl. Divide batter evenly between prepared pans.
- Cook the first two layers in the center of the oven for about 20-25 minutes or until an inserted toothpick comes out with crumbs. Repeat with the final layer.
- Cool the cakes in their pans on a rack for ten minutes. With a knife, loosen the sides of the cake. Place a large piece of plastic wrap on top of the cake pan and then place a wire rack on top. Invert the cake into board support and son together and place on the counter. Lift the pan and remove the parchment paper from the cake. Wrap the cake layer with plastic wrap and repeat with the other two layers. Place the layers in the freezer for about 15 minutes or refrigerator for 30 minutes while you make the icing.
7 large egg whites
1 3/4 cups granulated sugar
2 cups unsalted butter , room temperature and cut into cubes
2 teaspoons pure vanilla extract
pinch of salt
- Add the egg whites and sugar in the bowl of a electric mixer. Make sure it is completely wiped clean and dry first. Place the bowl over a pan of simmering water. Cook, stirring gently and continuously until the temperature reaches 130 degrees Fahrenheit.
- Return the mixer bowl and fit the fixing of the whip. Beat at high average speed until it reaches the stage of rigid tip (thick and shiny) about 2-3 minutes. Reduce to medium speed and beat until the bottom of the bowl is cool, about 10 minutes.
- Switch to the paddle attachment and with the mixer at low speed, add the butter one piece at a time. Beat until the mixture is silky smooth, about one minute. Add vanilla and salt and beat at low speed for three minutes more
- Tint frosting if desired
- Remove the cakes from the freezer or refrigerator and each layer by cutting the tops of flat cakes with a long serrated knife. Snack on trimmings while you finish the cake. :)
- Place a dollop of frosting in the center of a cake card and placing the first layer with the cut side down, on cake board. The icing will help keep slipping. Place the cake on a card hub for decoration. Spread frosting on top, then add the second cake layer, cut side down. Spread over frosting and top with third layer, cut side down.
- Apply more icing on the top layer and on the sides to a layer of breadcrumbs. The coat of the crumb is intended to catch the loose crumbs and prevent them to do in your final layer of icing. Once covered, you can use a bench scraper to smooth the sides easily.
- Place the cake in the refrigerator for about 30 minutes for the icing to firm up some. Then remove and apply a final layer of fluffy frosting on top and sides. Make sure the surface is as smooth as possible. When frosted and smooth, back in the refrigerator at least an hour to set up before covering in fondant.
- Lower Melter almost 1/4 of an inch thick with a diameter which is equal to at least the width of the top of the cake plus the height of the sides. In my case, the cake was 5 inches tall x 2 plus 8 inches wide. So I got the fondant until it was over 18 inches in total diameter.
- Lift using your fondant rolling pin and carefully unroll on top of cake. Smooth the fondant on the cake top and sides with a smooth fondant and cut the excess around the base
- NOTE :. I recommend the book to get Rosie all her advice on working with frosting and fondant to help. It has many tips and will much more detail than I here.
- Place the fondant covered cake in the refrigerator for 1-2 hours to dry before shooting. When firm and fondant is dry, doodling little drawings with an edible pen writing in black ink. Back in the fridge for 1-2 hours to allow in black ink to dry. Remove and fill the drawings with color edible ink pens of your choice.
- The cake will keep at room temperature for 24 hours and up to 3 days in the refrigerator.
:::::::::::::::::: :::::::: :::::::::::::::::::::::::
Enjoy !!!
Here's a look at some of the other inside the amazingness Sweetapolita Bakebook.
I think you'll love.
* This post contains affiliate links to Amazon.